
Mother's Day Weekend!
Take an extra 9% OFF with code: LOVE
Take an extra 9% OFF with code: LOVE


$24.99

$10.99 $10.43
$42.99 $40.80
$10.99 $10.43
$10.99 $10.43
$24.99 $23.72


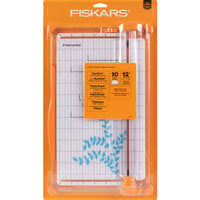
With the Fiskars Centering Ruler 2" x 14" Acrylic Ruler, all fabric cutting tasks are now easy and accurate! This ruler features two different measurement markings: one side features a traditional ruler with markings 1"-14" and the other side starts at 7", goes down to 0" in the middle, then goes back up to 7" to make centering easy. The durable acrylic design includes bold numbers for accuracy and broken grid lines for easy visibility of fabric edges. Ruler also features:

This ruler is well made, and I really like all aspects if the measuring units.
You must be signed in to comment. Please click here to sign in.

